

Short answer: Most people can assemble a pre-drilled louvered pergola kit. A standard residential module takes two people a weekend, needs no cutting or welding, and requires a tape, spirit level, string lines, socket set, rubber mallet, ladder and a drill. Building one from raw timber is a different project, and a large motorised system usually needs a contractor, an electrician and a permit.
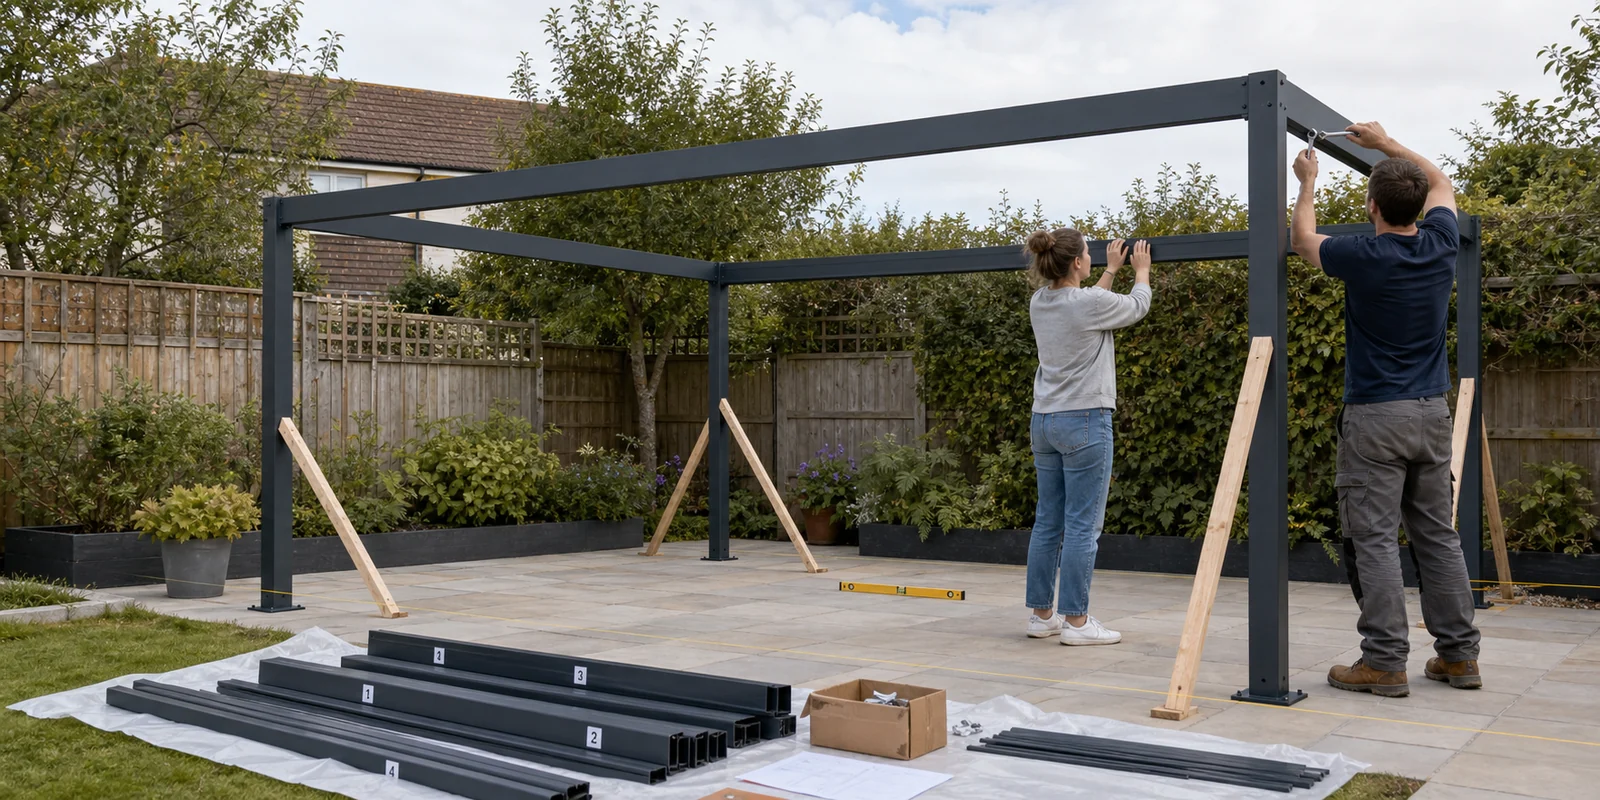
Three different projects hide behind this question, and they need three different answers. Building a louvered roof from raw lumber is a carpentry project with a mechanism in it. Assembling a pre-cut kit is a bolting exercise that rewards patience over skill. Installing a large motorised system is closer to a small construction job with an electrical trade attached. Deciding which one you are actually looking at is the first step, because the honest answer changes completely between them.
Three Projects, Not One
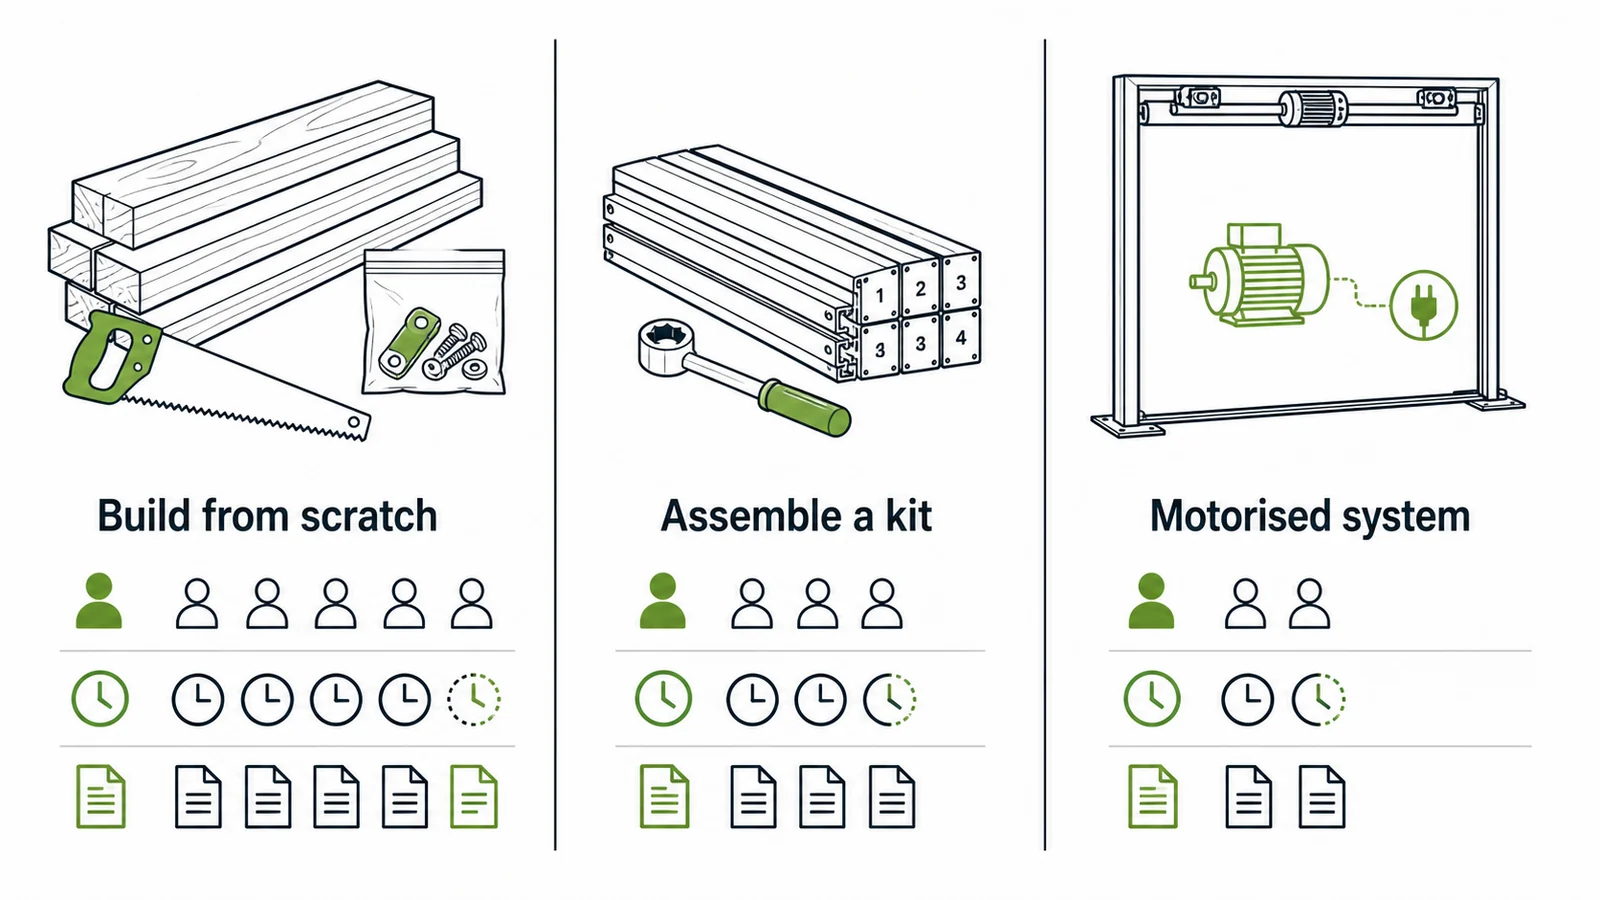
| Route | Skill needed | People | Typical time | Permit likely | Rated load figure |
|---|---|---|---|---|---|
| Scratch build from timber | Carpentry | 2 to 3 | Multiple weekends | Yes | None |
| Pre-drilled metal kit | Basic tools | 2 to 3 | 8 to 10 hours | Often | From manufacturer |
| Timber kit | Basic carpentry | 2 to 3 | 12 to 20 hours | Often | From manufacturer |
| Large or motorised system | Trade level | 3 plus electrician | Several days | Usually | From manufacturer |
Building from scratch
You buy timber, you buy a louver hardware set containing pivot hubs, brackets and an operating rod, and you build everything else. The frame is standard post-and-beam carpentry. The roof is where it stops being ordinary, and how a louvered roof actually works is worth reading before committing to build one, because a row of blades has to rotate together, sit level when closed, and keep doing both after the timber has been through a wet winter and a dry summer.
Assembling a kit
Every profile arrives cut to length and drilled. Nothing needs sawing, nothing needs measuring except the base. The work is reading a drawing, laying out accurately, and bolting in the right order. This is the route most people mean when they ask the question, and what a louvered pergola kit contains sets out what does and does not arrive in the cartons.
Installing a large or motorised system
Above roughly four metres of span, or with a motorised roof and integrated screens, the job changes character. Components get heavy enough to need three people or lifting equipment, electrical work enters the picture, and in many jurisdictions so does the building department.
Commercial terraces sit further along the same line again. Multiple modules, a shared control plan, drainage that has to connect to an existing system, and a completion date that other trades depend on all push the job out of DIY territory regardless of how capable the owner is.
Building From Scratch
The frame is the easy half
Posts, beams and footings are conventional. If you have built a deck you have done most of this before. The commonly available hardware sets are sized for a single bay, often around a nominal eight by eight foot opening, and larger roofs are divided into sections rather than run longer.
The mechanism is where projects fail
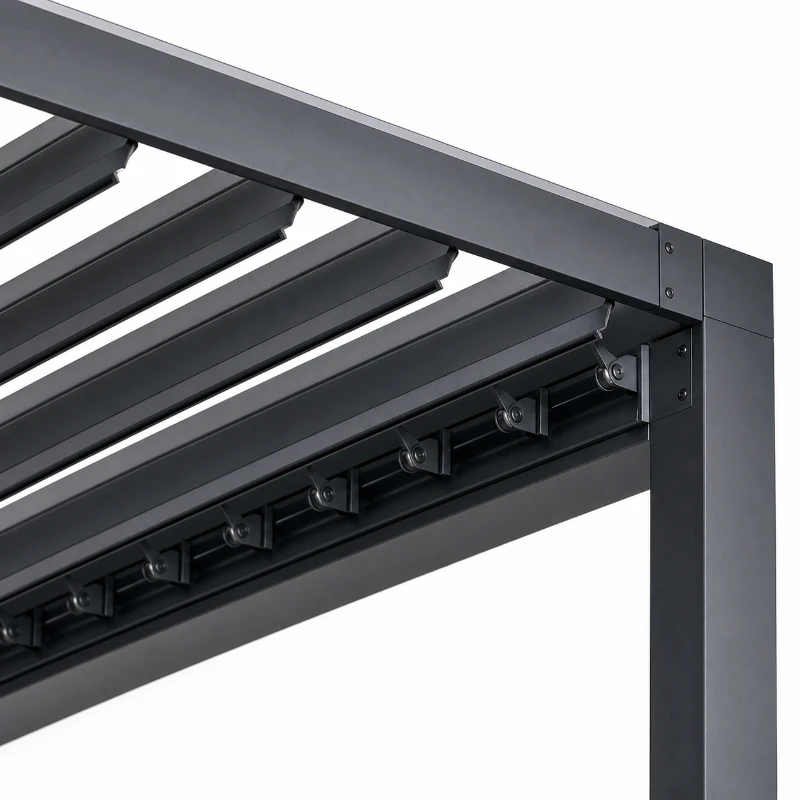
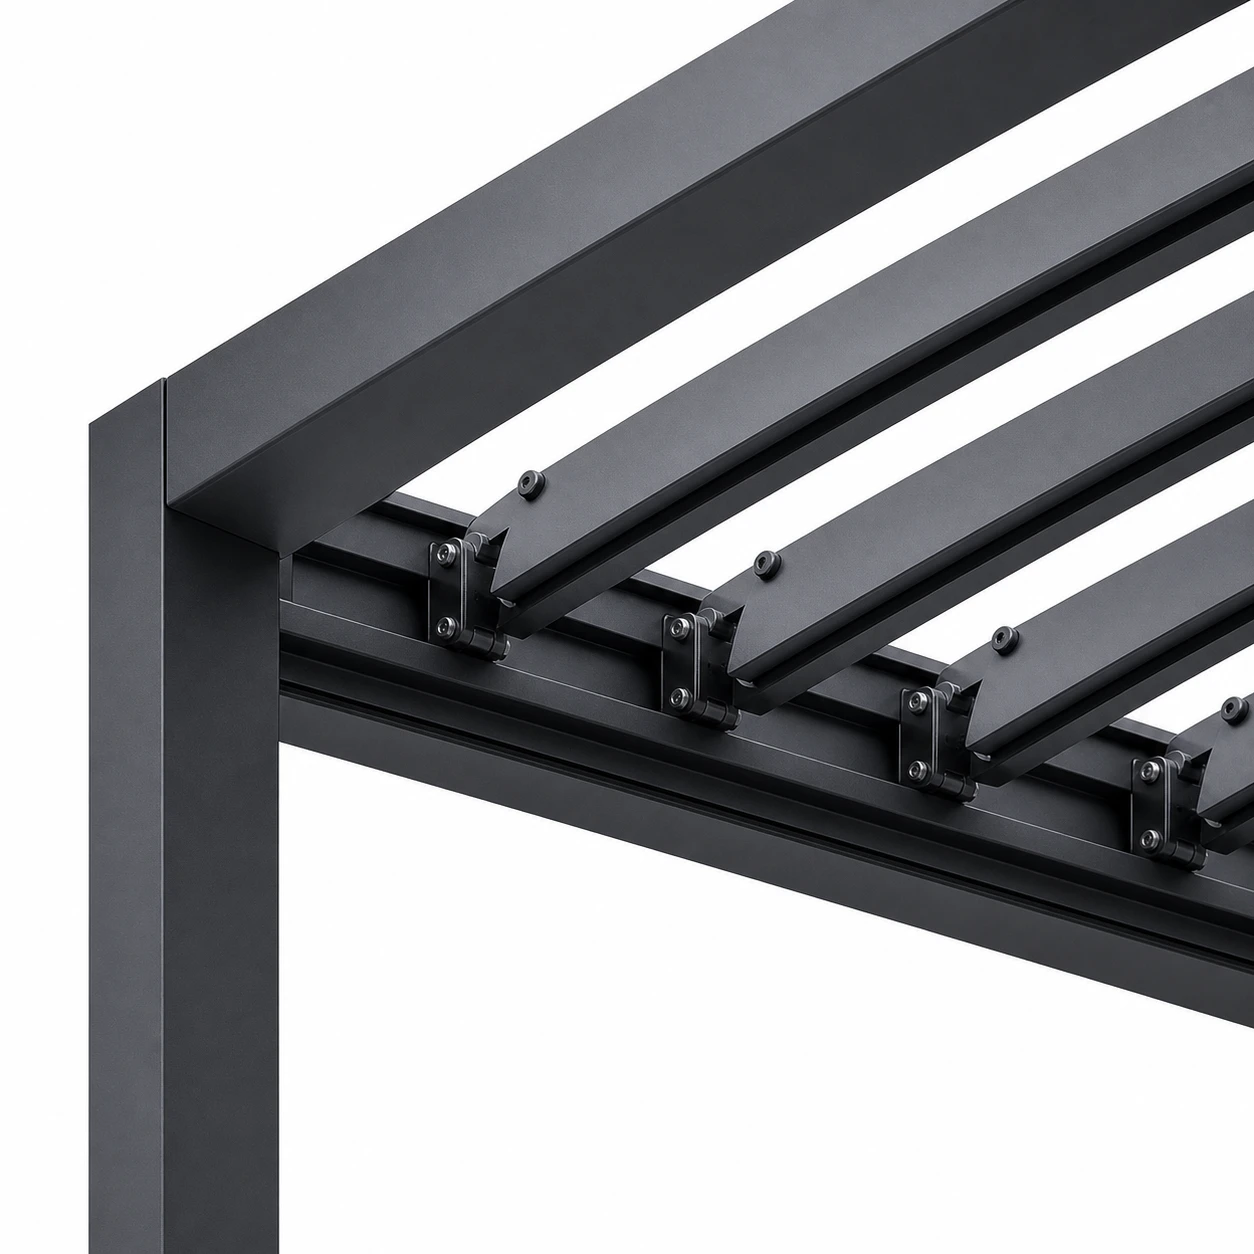
Every blade pivots on a hub at each end, and every hub connects to an operating bar that moves them as a group. Two things have to be right. The hubs on opposite sides must sit at exactly the same height, or the blade twists as it rotates. And the bar has to be free to move, which means the brackets are tightened enough to hold and no further. Over-tightening is the single most common error, and it produces a roof that feels stiff on day one and binds completely by the second season.
Hardware suppliers generally recommend cutting rails and operating bars with hand tools rather than power tools, because a hot cut deforms the section and the bar then drags in the bracket.
Timber selection changes the outcome
Cedar and redwood are the usual choices because they stay dimensionally stable and resist rot without treatment. Treated pine costs less and moves more, which matters more in a rotating component than in a fixed rafter. Boards are usually kept under about 2.4 metres and each section under roughly five square metres, because a longer blade run gets heavy enough to sag and to make the operating bar stiff.
What it realistically costs in time
Published accounts of scratch builds run into multiple weekends rather than a single one, and the roof takes longer than the frame. Anyone who has milled their own boards will tell you the mechanism was the part that needed doing twice.
For comparison, published assembly times across the kit market run roughly 4 to 8 hours for lightweight vinyl, 8 to 10 hours for pre-drilled aluminium, and 12 to 20 hours for timber, where boards still have to be cut and squared. A scratch build sits beyond all three, because everything a kit supplier has already done in the factory has to happen in the garden.
Assembling a Kit
This is the realistic DIY route for most people, and the published accounts are consistent about where the time goes.
Squaring the base takes longer than expected
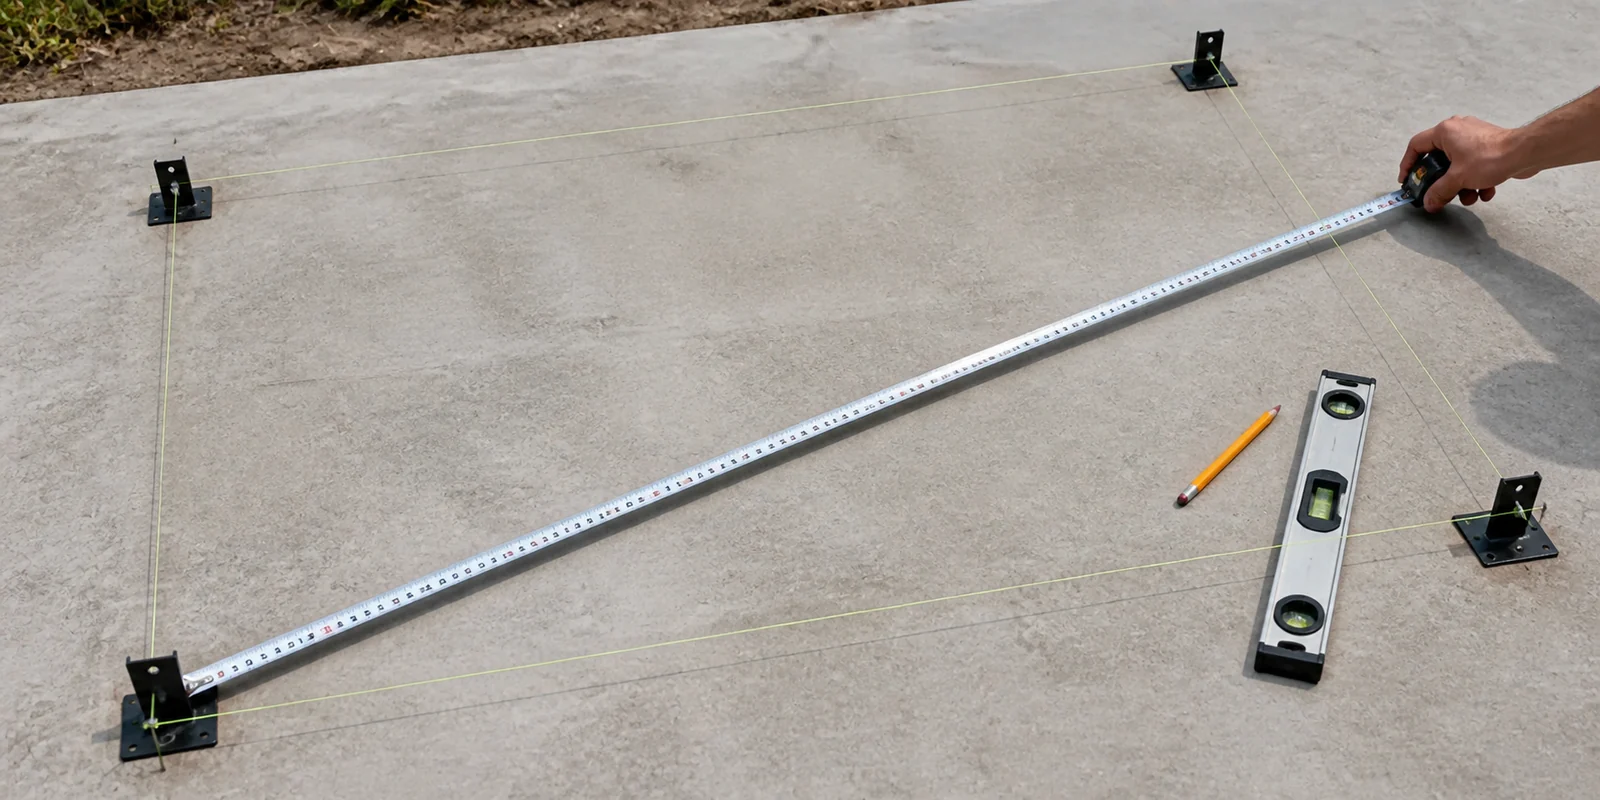
Set the posts plumb, measure the distances between them, then measure the diagonals. If the diagonals do not match, the frame is racked and every later step fights you, because the roof is a rigid rectangle that will not fit a parallelogram. Installers who have documented their own builds describe restarting this step several times, and describe it as the part that took longest.
The louver stage is tedious rather than difficult
On a typical residential module there are twenty to thirty blades, each with hardware at both ends. One documented install of a common consumer model counted 25 blades and 100 screws before a single blade went up. None of it is hard; all of it is slow. Preparing the blades on sawhorses at ground level, then carrying them up finished, saves a large part of the afternoon.
The blades then have to be connected to a single operating bar, and that is the point where a base that was not quite square makes itself known. If the roof will not close evenly along its whole length, the problem is almost always the frame rather than the blades.
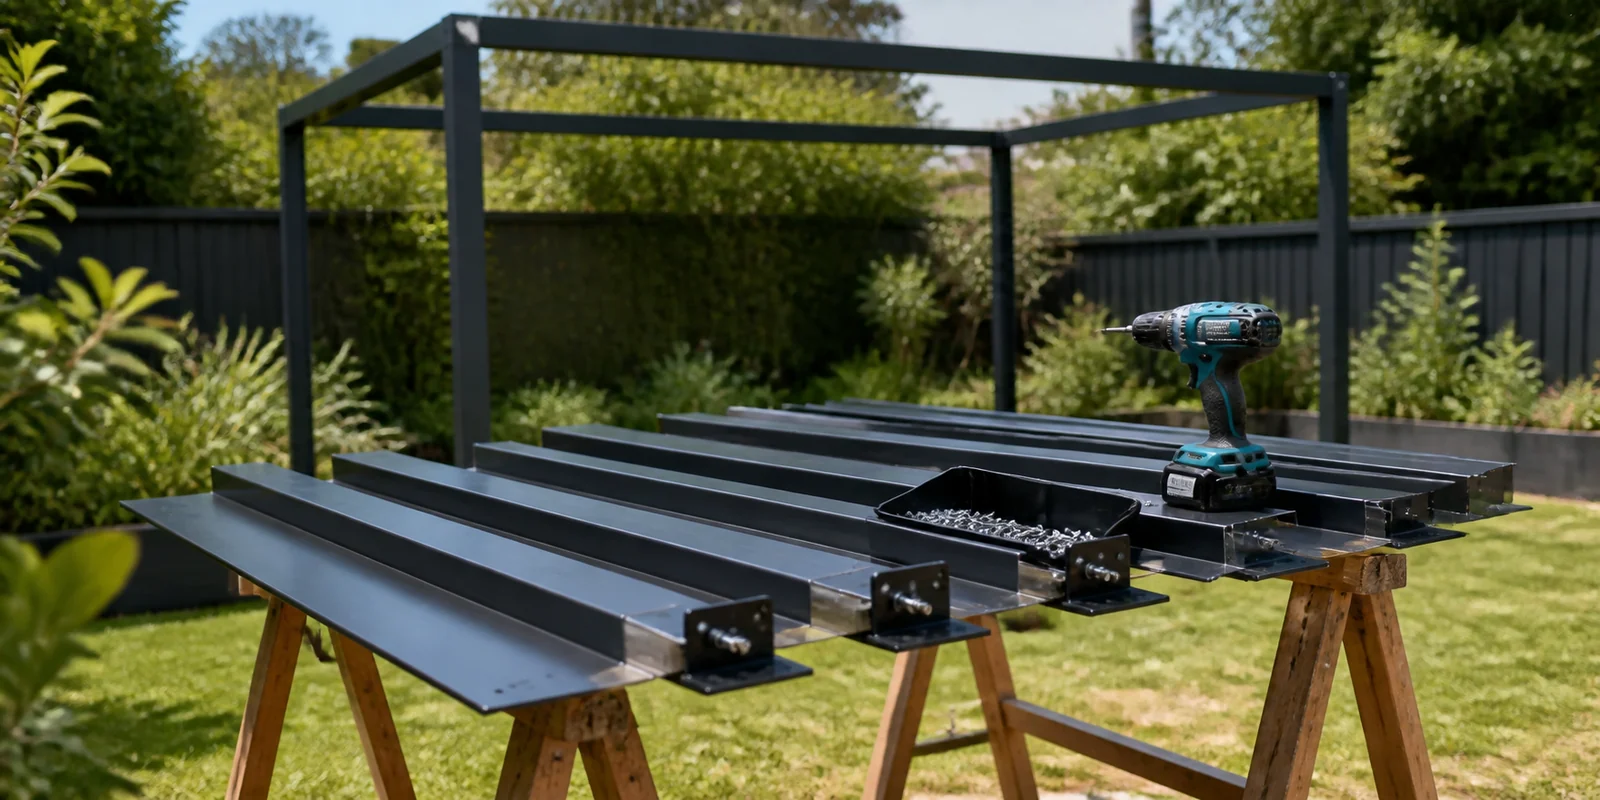
Two people minimum, three is better
Posts and beams are long and awkward rather than heavy, and a beam lifted by one person is how a powder coated profile picks up its first scratch. Manufacturers who publish DIY guidance are consistent on this point: two helpers at minimum, three for anything above a standard module.
Tools
A tape, a spirit level, string lines, a socket set, a rubber mallet, a ladder and a drill for the base anchors. A pre-drilled metal kit needs no cutting and no welding, which is what puts it within reach of someone who is comfortable with basic tools rather than a trade.
What the documentation changes
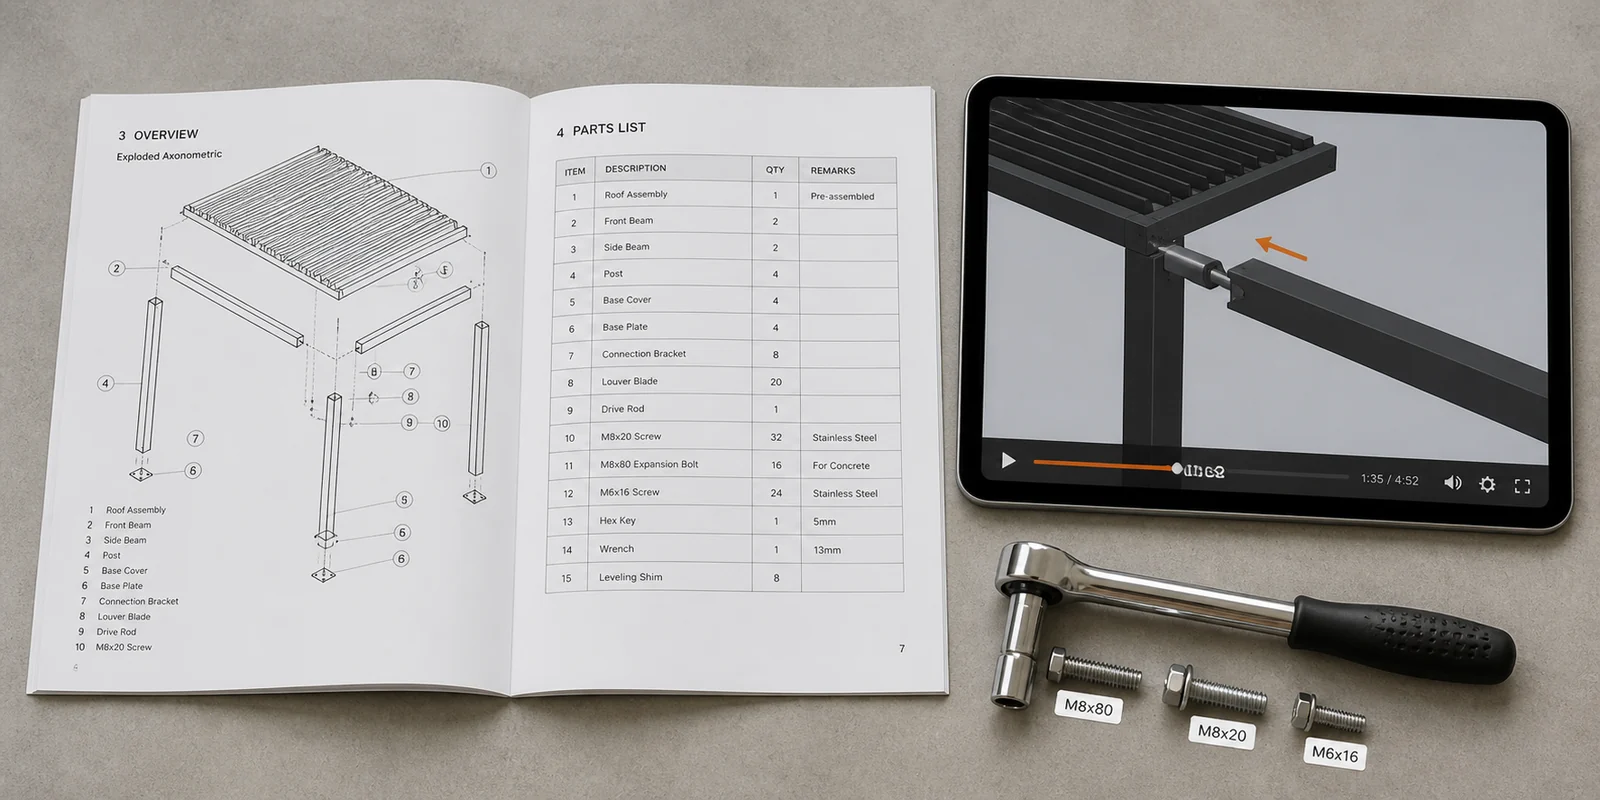
The gap between a four hour install and a twelve hour one is often the manual rather than the product. A parts list with numbered components, an exploded drawing showing which bracket goes where, and a stated bolt sequence remove the guesswork that consumes the afternoon.
alux supplies a complete printed manual with every unit, plus a 3D rendered installation video that follows the same sequence, and quotes roughly two hours to install a standard alux gazebo on a prepared base. That is an alux figure for alux units rather than a category norm, and it assumes the base is already level and square, which is the part that takes most of the time on any site. Where documentation is thin, allow the published category timings instead, and read whatever manual the supplier publishes before the order rather than after delivery.
The Parts That Are Not Optional
Footings
The structure has to land on something rated to carry it. A new concrete footing, an existing slab of adequate thickness, or a properly built deck frame all work; loose pavers over compacted fill do not. Anchors are usually excluded from kits, because the correct fixing depends on which of those four the structure lands on.
Permits and engineering
This is the step DIY guides most often skip and building departments least often overlook. A permanent roofed structure frequently needs a permit, and in many jurisdictions the application requires drawings stamped by a licensed engineer, along with reviews for structure and electrics. Where a wind or snow figure has to be supplied with that application, how those ratings are produced explains what the numbers refer to. In Europe the governing document is BS EN 13561, whose 2015 revision brought pergola awnings into scope and which defines the wind classes a certified figure refers to. In coastal or wetland areas, environmental review can apply as well. The manufacturer’s role is to supply test documentation that supports the application, which is a reason to ask for report numbers rather than summary claims before ordering.
Electrical work
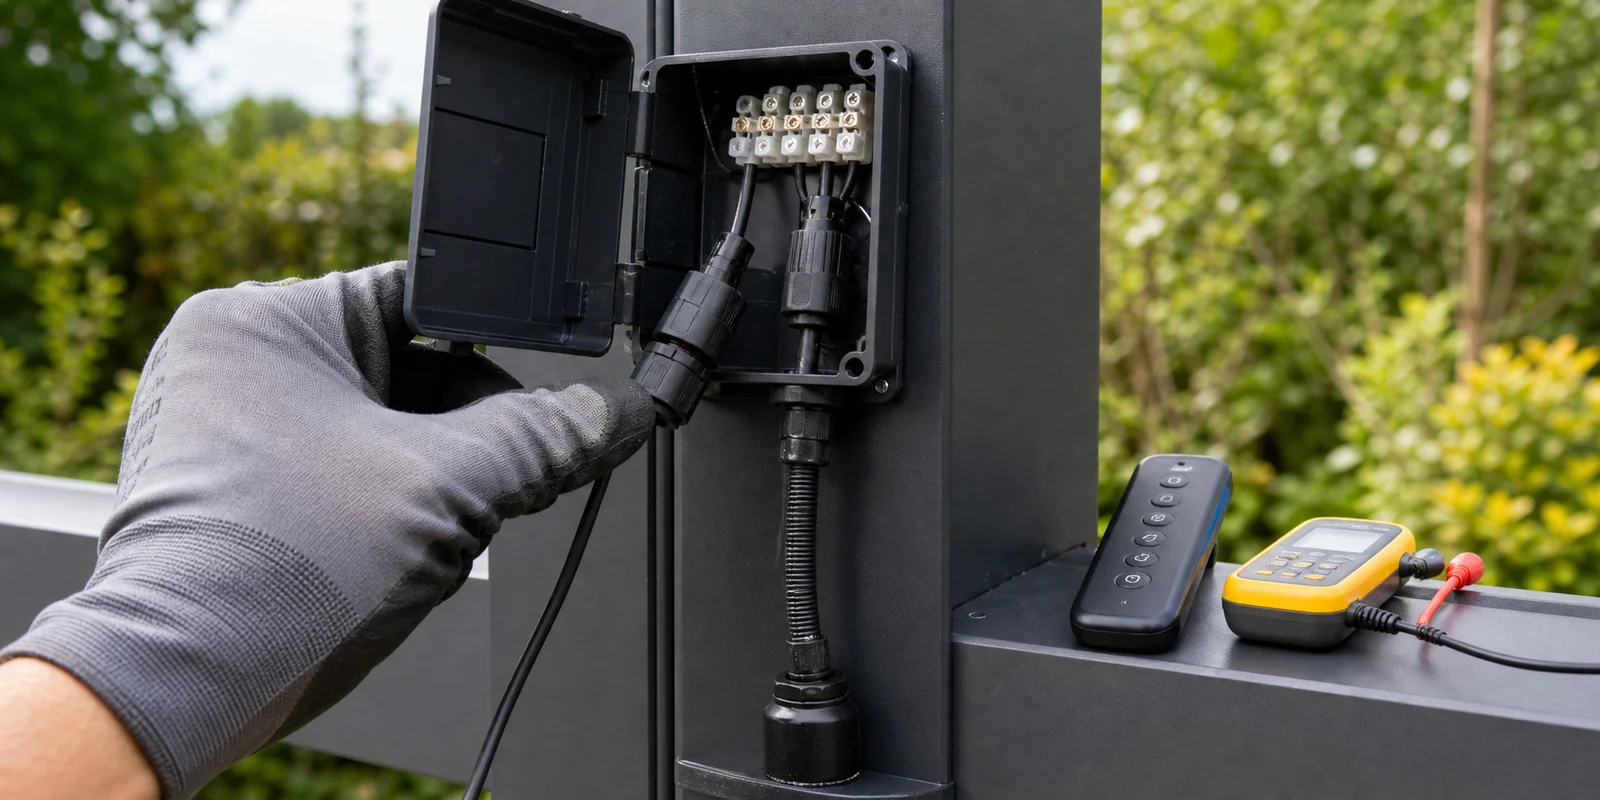
A motorised roof needs a supply to the controller. In most places that is regulated work, and doing it yourself may void both the product warranty and your home insurance. Confirm voltage, plug type and controller compatibility before shipment rather than on the day.
The drive itself is normally supplied pre-wired and pre-set, so the DIY portion is making plug connections rather than running new circuits inside the structure. Two specifications are worth checking before ordering, because neither can be corrected afterwards: the ingress rating, since the actuator lives inside the beam where damp lingers longest, and the stroke length, which sets how far the blades can rotate. alux specifies a 24V DC linear actuator rated 600N at IP67, with stroke selected against blade width to give the full 0 to 180 degree range.
An Honest Skill Assessment
The question is not whether you are handy. It is whether you are comfortable with four specific things.
Accurate layout
Everything downstream depends on a square, level base. If setting out a rectangle to within a few millimetres and checking it by diagonal is unfamiliar, that is the skill to practise first.
Working at height
Blades are installed from a ladder, repeatedly, with both hands occupied. On a module with 25 blades that is 25 trips up and down before the operating bar goes on. If that is not something you are comfortable doing in an afternoon, this is a job for someone else.
Height also determines how many people the job needs rather than how many it can use. A standard residential module at around 2.4 metres is manageable with two. Anything taller, or attached to a wall at first-floor level, moves into territory where scaffolding rather than a ladder is the sensible answer.
Reading an assembly drawing
Kit instructions are drawings with part numbers, not prose. Most manufacturers publish the manual on their website, and reading it before ordering rather than after delivery is the cheapest possible risk check.
Knowing when to stop
The most useful DIY skill is recognising the point at which a job stops being a DIY job. Setting posts in concrete and getting them square is a reasonable point to bring in help even if you intend to do everything else yourself.
There is also a warranty dimension. Some manufacturers reduce or void structural cover on self-installed units, and most exclude damage caused by installation error regardless. Worth reading before the boxes are opened rather than after a blade is bent.
What DIY Actually Saves
The kit is the smaller number
Across the market, timber kits and lightweight imported aluminium sit at the lower end, and commercial-grade motorised systems with structural certification sit well above them. The spread inside the aluminium category alone is several times over, which is why comparing two kits on headline price without comparing section sizes, coating thickness and load ratings tells you very little.
Four figures separate them, and all four should be in writing before a price comparison means anything: post and blade section sizes, coating thickness in microns with the pretreatment underneath, drive force with stroke and IP rating, and any wind or snow figure quoted against the module size it was tested at. As a reference point, alux steel systems use a 100 by 100 mm post with blades from 123 by 19.8 mm to 150 by 34 mm, and around 80 microns of powder coating tested to 168 hours of salt spray. The wider material question is covered in steel pergola versus aluminum pergola.
Installation is the larger number
Professional installation of a louvered system is routinely quoted at a figure comparable to the kit itself, and often more where footings, drainage and electrics are involved. That is what a DIY build saves, and it is a real saving rather than a marketing one.
The costs that get forgotten
Concrete and reinforcement. Anchors, which are usually not in the box. Permit and engineering fees where they apply. An electrician for the supply. Tool hire if you do not own a level long enough or a ladder tall enough. Sealant and touch-up paint, which are cheap, needed on most installs and rarely included.
Which Route Suits Which Buyer
A small manual roof over a patio, on an existing slab, from a pre-drilled kit, with two helpers and a free weekend: a realistic DIY project for someone comfortable with basic tools.
A large motorised system with integrated screens and lighting, on new footings, in a jurisdiction that requires a permit: a professional job with the owner project-managing it.
A scratch build from lumber and a hardware set: a genuine carpentry project, satisfying if that is what you enjoy, and slower than every published estimate. It also produces a structure with no rated wind or snow figure, which matters if a permit is required or an insurer asks.
For dealers and installers evaluating which products their own crews can handle, the practical dividing line is pre-drilling. A kit where every hole is punched at the factory against the same drawing that produced the cut list can be installed by a general crew. One that requires holes to be made on site cannot, because the accuracy of the finished frame then depends on whoever is holding the drill. alux supplies knock-down kits pre-drilled for that reason, alongside the printed manual, the 3D installation video and the test documentation permit applications tend to ask for. Current specifications are on the louvered pergola page, and dealer or private-label programmes run through OEM and ODM.
Key Points
- A pre-drilled metal kit needs no cutting or welding and is within reach of anyone comfortable with basic tools.
- Two people is the working minimum; three for anything above a standard module.
- Squaring the base is the step that decides everything above it, and the one most often redone.
- A module with 25 blades means roughly 100 fasteners, and fitting them at ground level saves most of an afternoon.
- Ground anchors, the drainage connection, electrical supply and consumables are normally site items rather than kit contents.
- A permit is frequently required, and applications often need engineer-stamped drawings plus a certified wind or snow figure.
- A scratch build produces no rated load figure, which matters if a permit or an insurer asks for one.
Conclusion
Yes, most people can assemble a louvered pergola kit, and a good number can build one from scratch if they enjoy carpentry. What decides the outcome is not the roof mechanism but the preparation around it: a square and level base, footings suited to the ground, a permit where one is required, and a qualified electrician if the roof is motorised. Read the assembly manual before you order, not after it arrives, and be honest about how many people you can get on site the weekend you plan to build.
Frequently Asked Questions
Can a Louvered Pergola Kit Be Assembled Without a Contractor?
For a standard residential module on a prepared base, yes. A pre-drilled metal kit needs no cutting or welding, and the tools are a tape, spirit level, string lines, socket set, rubber mallet, ladder and a drill for the base anchors. What it does need is two people at minimum, and three for anything above a standard size.
How Long Does It Take to Install a Louvered Pergola?
Published figures across the market run roughly 4 to 8 hours for lightweight vinyl, 8 to 10 hours for pre-drilled aluminium, and 12 to 20 hours for timber, where boards still have to be cut and squared. Base preparation sits outside all of those numbers, and documentation quality accounts for much of the spread.
How Many People Are Needed to Install a Louvered Pergola?
Two as a working minimum, three for larger modules. Posts and beams are long and awkward rather than heavy, and a beam lifted alone is how a powder coated profile picks up its first scratch. One person can lay out, prepare blades at ground level and handle fixings.
What Is the Hardest Part of a DIY Louvered Pergola?
Squaring the base. The roof is a rigid rectangle and will not fit a frame that is out of square, so plumb posts, equal spacings and matching diagonals have to be right before anything above them is bolted. Installers who document their own builds consistently describe restarting this step more than once.
Do I Need a Permit to Build a Louvered Pergola?
Frequently, because it is a permanent roofed structure. Requirements vary by jurisdiction, and applications often ask for drawings stamped by a licensed engineer plus structural and electrical review. Check with the local building department before ordering, and ask the supplier for test report numbers rather than summary claims.
Can I Wire a Motorized Louvered Roof Myself?
The drive is normally supplied pre-wired, so connecting it is a plug operation. The supply to the controller is different: in most places that is regulated electrical work, and doing it yourself can void both the product warranty and home insurance.
Is Building a Louvered Roof From Timber Realistic?
It is a genuine carpentry project rather than an assembly job. The frame is conventional post-and-beam work; the mechanism is not. Pivot hubs must sit at matching heights on both sides, brackets need to be tight enough to hold and no tighter, and timber blades move seasonally. It also produces a structure with no rated wind or snow figure.
Does the Supplier Provide Installation Instructions?
Quality varies widely, and it is worth checking before ordering rather than after delivery. A useful package includes a numbered parts list, an exploded assembly drawing and a stated bolt sequence. alux supplies a printed manual with every unit plus a 3D rendered installation video following the same sequence.
How Much Does DIY Installation Save?
Professional installation of a louvered system is routinely quoted at a figure comparable to the kit itself, and more where footings, drainage and electrics are involved. Against that, budget for concrete, anchors, permit and engineering fees, an electrician, tool hire, and consumables such as sealant and touch-up paint.